For Valentine’s this year my friend and I decided to make cake pops for the first time and bring them into our office. My good friend Jessica gave me her ‘secret’ recipe and they turned out amazing! We chose to do red velvet because it fit the Valentine’s color scheme and they sure were yummy!
Monthly Archives: February 2013
Bruschetta Chicken Bake
If you are fan of the famous Italian appetizer ‘bruschetta’ I can bet you will be fond of this bruschetta chicken bake. For those chefs out there, this is recipe that can be tweaked and you can have fun playing around with the ingredients to perfect it to your taste buds. I am no chef, but I enjoyed taking the original recipe and modifying it to make it my own. This is the perfect meal to pair with candlelight and a bottle of your favorite wine. Enjoy!
What you need:
1 1/2 pounds skinless, boneless chicken breast halves – cubed
1 teaspoon salt
2 large tomatoes
1 tablespoon garlic powder
1 (6 ounce) box chicken-flavored dry bread stuffing mix
4 cups shredded mozzarella cheese
2 tablespoon balsamic vinegar
Dash red pepper flakes
1 tablespoon fresh chopped basil
1 tablespoon Italian seasoning
Preheat oven to 400 degrees F. Spray a 9×13-inch glass baking dish with cooking spray. Dice the tomatoes and toss with water, 1 tablespoon balsamic vinegar, fresh basil, red pepper f
Add the tomato mixture to the stuffing mix; set aside to soften.
Toss the cubed chicken with salt/pepper, 1 tablespoon balsamic vinegar, and garlic powder. Place the chicken in a layer at the bottom of the dish.
Sprinkle the cheese on top of the chicken then sprinkle the Italian seasoning. Spread the soften mix over the top of the chicken. Bake uncovered until the chicken cubes have turned white and are no longer pink in the center, about 30 minutes.
Easy Jar Vases
Copperwood Kennels Logo Reveal…
After hours and hours of design deliberation, we finally came up with the finishing touches on the business logo. Things are coming along wonderfully with the business and we are very excited to start the Copperwood Kennels adventure !! A huge thank you to Matt’s best friend, Kyle Twiddy, who helped draw the logo image, it turned out exactly as Matt envisioned!
Samoa Cookie Bars
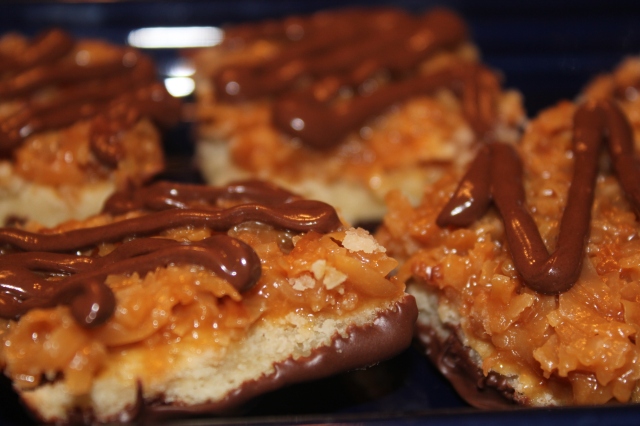
At it again. The newest dessert creation from my Pinterest board that my friend and I tried out are these delish Samoa Cookie Bars. Waiting for those girls scout cookies to come around once a year for those caramel ooey gooey Samoa cookies, just does cut it for me. These bars are a great fix for a Samoa cookie craving and turned out wonderful! As a fair warning these do take some time.
Makes 30 bars
Cookie Base
1/2 cup sugar
3/4 cup butter, softened
1 large egg
1/2 tsp vanilla extract
2 cups all purpose flour
1/4 tsp salt
Topping
3 cups shredded coconut (sweetened or unsweetened)
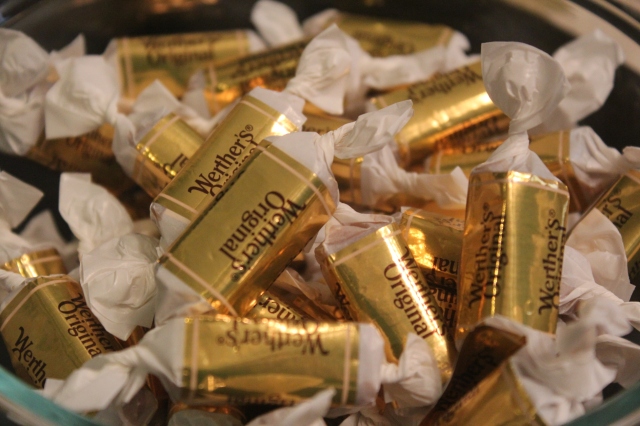
12-oz good-quality chewy caramels
1/4 tsp salt
3 tbsp milk
1 bag semisweet chocolate chips, melted
Make the cookie base first.
Preheat the oven to 350 degrees. Lightly grease a 9×13 pan. In a mixing bowl cream together the butter and sugar until smooth and fluffy. Mix in the egg and vanilla. On a low speed, gradually beat in flour and salt until mixture is crumbly, like wet sand. The dough does not need to come together. Pour crumbly dough into prepared pan and press into an even layer. Bake for 20-25 minutes, until base is set and edges are lightly browned. Cool completely on a wire rack before topping.
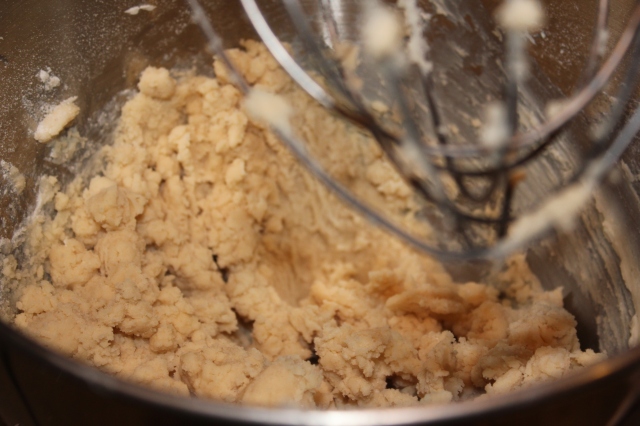
While cookie base is cooling, make topping.
Preheat oven too 300. Line a cookie sheet with parchment paper and spread coconut over the top.
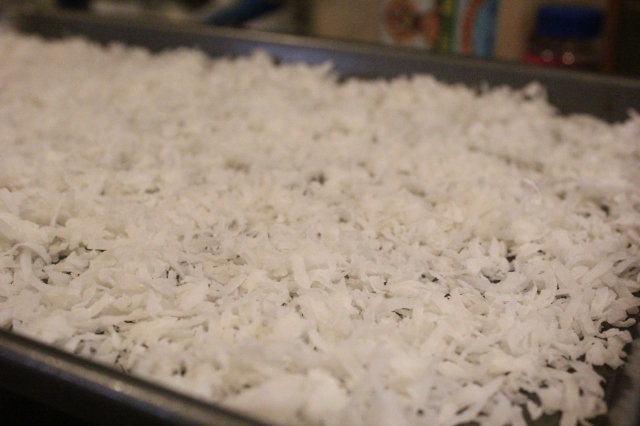
Toast for 20 minutes, stirring every 4-5 minutes until the coconut is toasted. Let it cool on the baking sheet.
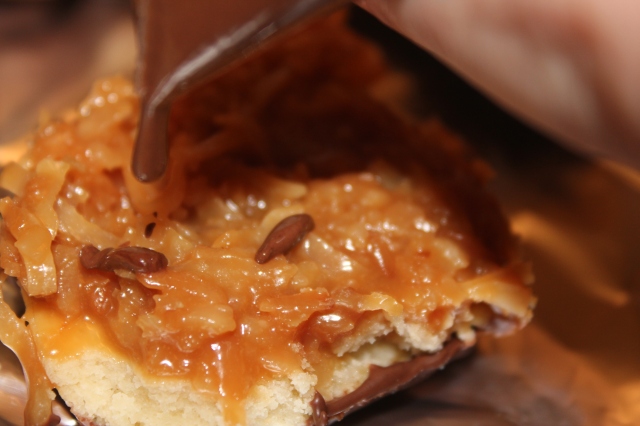
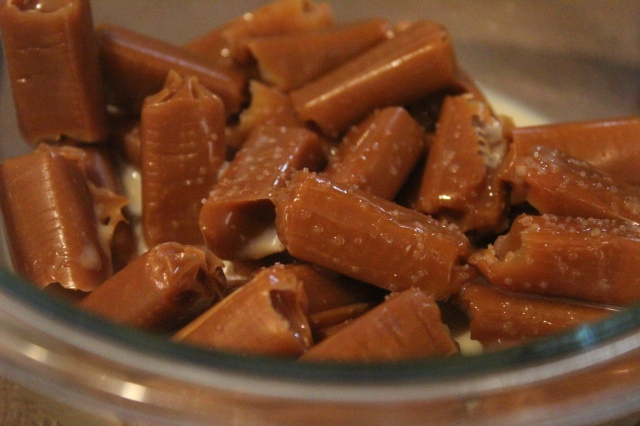
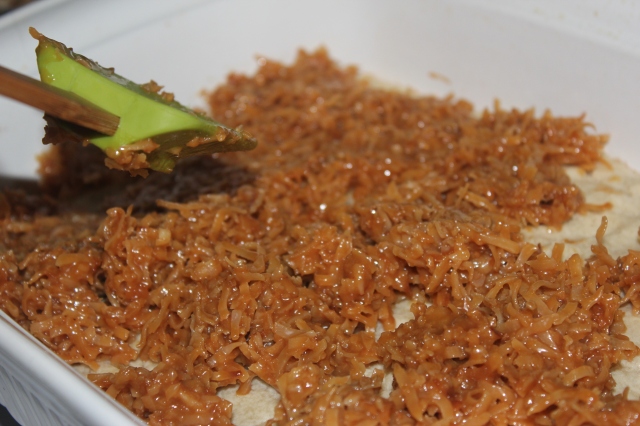
Place the unwrapped caramels in large microwave-safe bowl with milk and salt. Cook on high for 3-4 minutes, stopping to stir a few times to help the caramel melt. When smooth, fold in toasted coconut with a spatula.
Put dollops of the topping all over the shortbread base. Using the spatula, spread topping into an even layer. Let topping set until cooled.
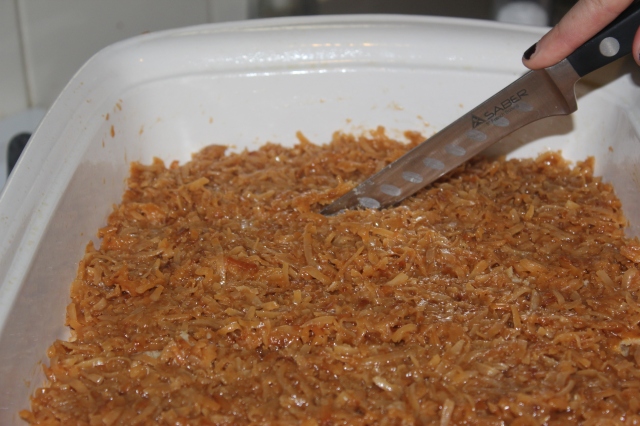
When cooled, cut bars into squares with a knife.
Once bars are cut, melt chocolate in a small bowl. Heat on high in the microwave in 45 second intervals, stirring thoroughly to prevent scorching
Dip the base of each bar into the chocolate and place on a clean piece of parchment or tin foil. Transfer all remaining chocolate (or melt a bit of additional chocolate, if necessary) into ziploc bag with the corner snipped off and drizzle bars with chocolate to finish.
Let chocolate set completely before storing in an airtight container.
Liam’s Medieval 4th Birthday
Jessica & Chris, a couple of our good friends, threw an amazing 4th birthday for their son Liam. When Jessica told me it was going to be a dragon/medieval theme party, I didn’t expect anything less than spectacular as I’m almost certain creativity flows through her blood. From an amazing dragon cake to the transformation of their garage into a castle, ‘creativity’ doesn’t even begin to illustrate how impressive this party was. This was definitely a birthday Liam will never forget!